
how to fix car door lock actuator replacement usually comes down to three things: confirming it’s truly the actuator (not a fuse, switch, or wiring issue), removing the door panel without breaking clips, and installing the correct actuator so the latch moves smoothly again.
If your door won’t lock/unlock with the fob, makes a weak buzzing sound, or works only sometimes, you’re not alone. Actuators wear out, linkages loosen, and moisture inside the door can speed up failure. The good news is the job is very doable for many DIYers with basic tools, as long as you take your time.
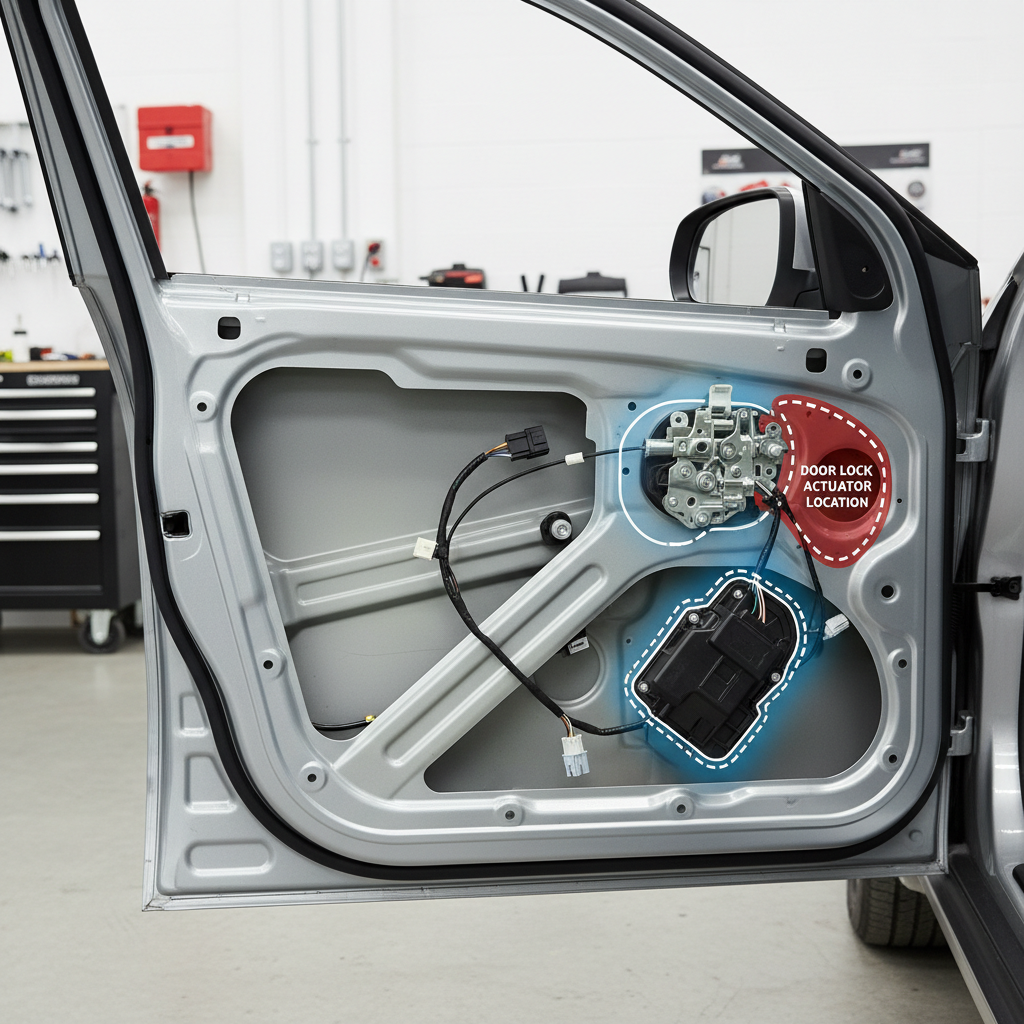
One quick reality check: different makes and model years hide fasteners in different places, and some actuators are integrated with the latch. So you’ll follow the same logic, but the exact screws and connectors may vary. If you want fewer surprises, pull up a vehicle-specific diagram before you start.
Key takeaways: verify the fault first, protect the vapor barrier, avoid forcing link rods, and test the lock before reassembling the panel.
What the door lock actuator does (and how failures show up)
The actuator is the small electric motor and gear assembly that moves the lock mechanism. When it weakens or binds, you’ll see symptoms that look “electrical” even though the problem is mechanical inside the actuator housing.
- Intermittent locking: it works when it’s warm, stops when cold, or only works after multiple button presses.
- Weak sound or no movement: you hear a faint whir/click but the lock knob barely moves.
- One door misbehaves: other doors respond normally, pointing away from the fob or body control module.
- Manual lock feels stiff: can indicate latch binding, not only the actuator.
According to NHTSA, power door locks are a safety-related convenience feature for many drivers, and any malfunction that affects entry/exit should be addressed promptly, especially if it could delay egress in an emergency.
Before you replace anything: a fast diagnosis that saves money
This is where a lot of people get stuck. They order an actuator, tear the door apart, and later learn the real problem was a blown fuse, a broken wire in the door jamb, or a switch that isn’t sending a signal.
Quick decision checklist
- Only one door fails? likely actuator, latch, or door-specific wiring.
- All doors fail? check fob battery, fuse, relay, or body control issues.
- You hear the actuator but it can’t move the lock? suspect actuator gears or a binding latch/linkage.
- No sound at all on the bad door? could be actuator motor, connector, broken wire, or the switch.
Two simple tests (no scan tool required)
- Fuse/relay check: verify the power lock fuse(s) in the cabin/engine box. Your owner’s manual usually labels them clearly.
- Door-jamb wiring check: open the door and inspect the rubber boot between the door and body. Cracked insulation or broken conductors can cut power to the actuator.
If you own a multimeter, you can back-probe the actuator connector while pressing lock/unlock. Seeing voltage but no movement strongly suggests actuator failure. If you’re unsure, a shop can confirm quickly; that small diagnostic fee sometimes prevents buying the wrong part.
Tools, parts, and time estimate (what you actually need)
Most actuator replacements are a 1–3 hour job depending on door design, rust, and clip condition. Expect extra time the first time you remove a door panel without breaking anything.
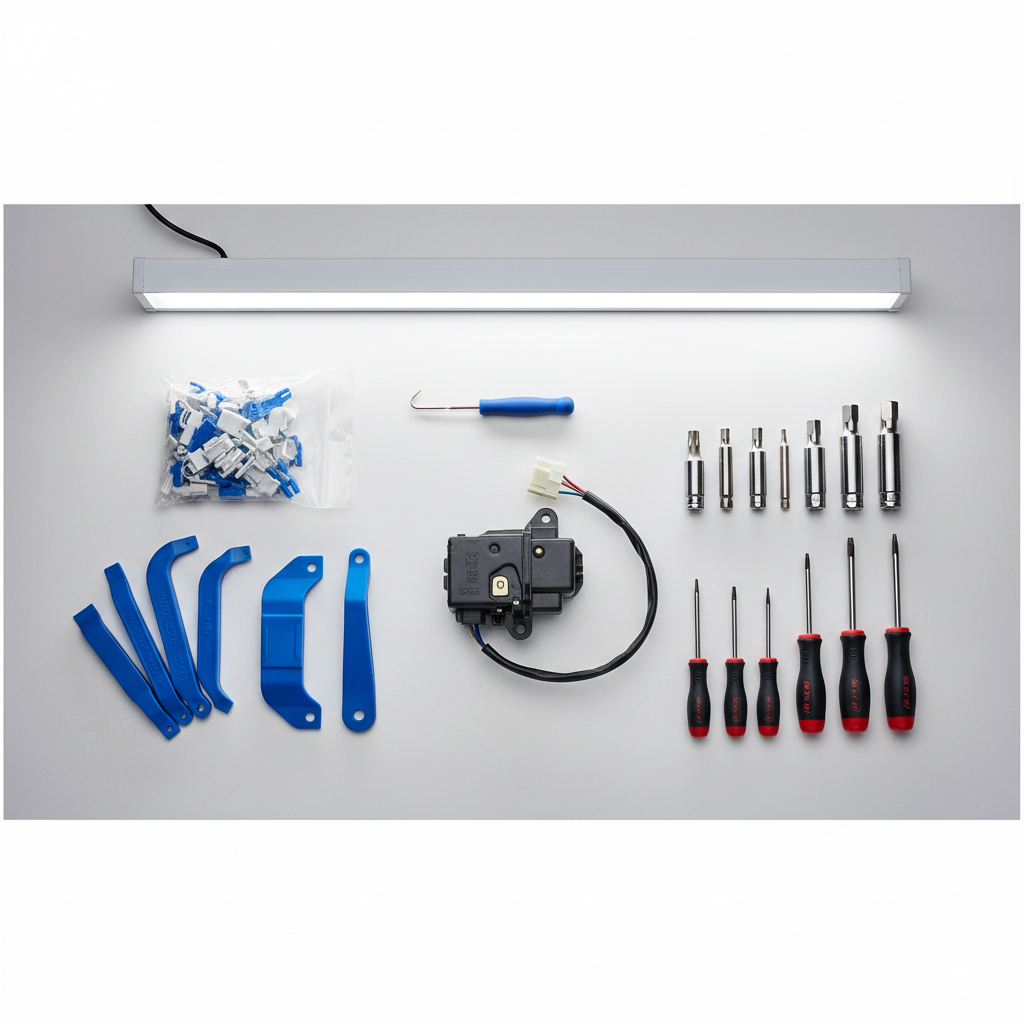
- Trim removal tools (plastic pry tools help avoid scratches)
- Torx bits and sockets (common sizes vary by vehicle)
- Phillips/flat screwdrivers
- Needle-nose pliers for clip and linkage handling
- Painter’s tape to protect trim edges
- Replacement actuator (or latch/actuator assembly if integrated)
- New door panel clips (smart to have spares)
Parts tip: match by VIN when possible. “Looks the same” is how people end up with reversed connectors or the wrong mounting points.
Step-by-step: how to replace a car door lock actuator
This workflow fits most vehicles. Your service manual may swap a step or two, but the idea stays consistent: access, disconnect, unbolt, swap, test, reassemble.
1) Prep and safety
- Park on level ground, window up.
- If your door has side airbags, disconnect the negative battery terminal and wait a few minutes before unplugging anything in the door. If you’re uncertain about airbag connectors, it’s safer to consult a professional.
2) Remove the interior door panel carefully
- Find hidden screws behind the handle trim, switch panel, or small covers.
- Use a trim tool to pop the panel clips around the perimeter, working slowly.
- Lift the panel up and off the window channel, then unplug switch connectors.
Try not to “yank and hope.” Door panels crack, and replacement trim can cost more than the actuator.
3) Peel back the vapor barrier without ruining it
- Gently pull the moisture barrier back near the latch area.
- Keep the butyl adhesive clean so it reseals later.
Skipping this reseal is a common reason for future water leaks and window fogging.
4) Access the latch/actuator and disconnect linkages
- Locate the actuator near the latch, usually at the trailing edge of the door.
- Disconnect the electrical connector by releasing its lock tab.
- Unclip lock rods/linkages. Note the orientation of any colored retaining clips.
If a clip feels brittle, plan to replace it. Forcing a 10-year-old plastic retainer rarely ends well.
5) Remove the actuator (or latch assembly)
- Remove Torx/bolts holding the latch or actuator bracket.
- On integrated units, you may remove the whole latch/actuator assembly as one piece.
6) Install the new actuator and verify smooth movement
- Transfer brackets or grommets if required.
- Reconnect link rods exactly as before, no bending unless the manual requires it.
- Reconnect the electrical connector firmly until it clicks.
7) Test before reassembly
- Reconnect the battery (if disconnected), then test lock/unlock from the fob and inside switch.
- Confirm the manual lock knob moves freely, and the latch opens from inside and outside.
Only after it passes these checks should you reseal the vapor barrier and reinstall the panel.
Common pitfalls (these cause “replacement didn’t fix it” situations)
- Wrong diagnosis: broken door-jamb wiring can mimic actuator failure, especially intermittent issues.
- Vapor barrier left loose: water intrusion leads to corrosion in connectors and window switch problems.
- Linkage clipped incorrectly: door locks but won’t open, or opens but won’t lock.
- Aftermarket fitment surprises: connector keying or stroke length sometimes differs by trim package.
- Not testing with the panel off: you miss a misrouted rod and redo the job.
Cost, difficulty, and when DIY makes sense (quick table)
Prices vary heavily by vehicle and whether the actuator is sold separately or only with the latch. This table is meant to help you decide, not to pin down an exact quote.
| Scenario | Parts complexity | DIY difficulty | Notes |
|---|---|---|---|
| Actuator sold as separate unit | Low to medium | Medium | Usually the best DIY candidate if door panel access is straightforward. |
| Actuator integrated with latch | Medium to high | Medium to hard | More bolts, tighter angles, more linkages to route correctly. |
| Intermittent issue + visible wiring wear | Medium | Hard | May require wiring repair inside the jamb boot; diagnosis matters more than speed. |
| Side airbag in door + uncertain connectors | Varies | Hard | Safer to get help if you’re not comfortable working around SRS wiring. |
Practical tips to make the repair last
If you’re going to the trouble of opening the door, it’s worth doing a couple small things that reduce repeat failures.
- Clean and lightly lubricate the latch with a product intended for latches, not heavy grease that attracts grit.
- Replace weak panel clips so the panel sits tight and won’t rattle.
- Route wiring like the factory, away from window tracks and sharp edges.
- Seal the vapor barrier completely, especially around speaker openings and wire pass-throughs.
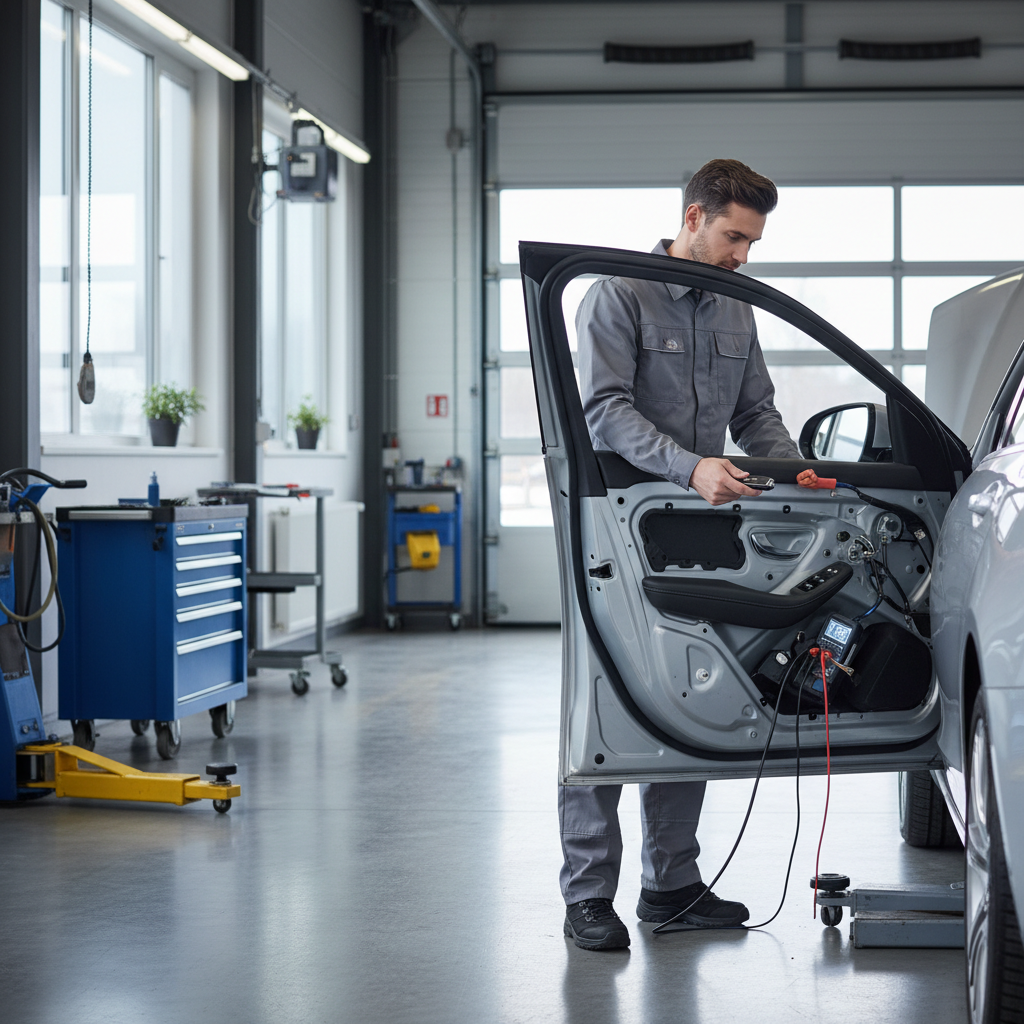
If the lock still feels sticky after a new actuator, don’t ignore it. A binding latch can overwork the new part and shorten its life.
Wrap-up: what to do next
Once you understand what failed, how to fix car door lock actuator replacement becomes a straightforward process: confirm the actuator is the culprit, remove the panel without damage, swap the part, then test before putting everything back together.
If you want a simple plan, do this: diagnose with the one-door vs. all-doors logic, inspect the door-jamb boot, then commit to replacement only when the symptoms point strongly to the actuator. You’ll save time, clips, and frustration.
FAQ
How do I know if it’s the actuator or just a blown fuse?
If only one door fails, a fuse is less likely. A blown fuse often affects multiple locks or related functions. Checking the fuse box is still a quick first step because it’s easy and cheap.
My lock makes a clicking noise but doesn’t move. Is that the actuator?
Often, yes, it can be stripped gears or a weak motor inside the actuator. But a binding latch or misaligned linkage can also block movement, so check that the manual lock feels smooth.
Do I need to disconnect the battery to replace a door lock actuator?
It’s a good habit. If the door contains side airbag components, disconnecting the battery is strongly recommended to reduce risk. If you’re uncertain about SRS connectors, getting professional help is sensible.
Can I replace just the actuator motor instead of the whole unit?
On some vehicles, enthusiasts do this, but it’s not always practical or reliable because housings are sealed or the wear is in the gears and mechanism, not only the motor.
Why did my new actuator still not fix the problem?
The common causes are incorrect part fitment, a broken wire in the door-jamb boot, a connector not fully seated, or a latch that binds. Testing for voltage at the connector helps narrow it down.
Is it normal for the door panel clips to break?
It’s common, especially on older vehicles. Having spare clips on hand turns it from a headache into a minor inconvenience.
How long should a door lock actuator last?
It varies by vehicle, climate, and how often the locks cycle. Frequent use and moisture intrusion can shorten lifespan, which is why resealing the vapor barrier matters.
If you’re in the middle of a no-lock situation and want a more straightforward path, a repair shop can confirm the diagnosis quickly and tell you whether your car uses a separate actuator or an integrated latch assembly, which often saves a second teardown.