
How to undercoat a car at home comes down to two things most DIYers underestimate: prep and safe spraying. Do those well and your undercoating can look clean, cure right, and actually protect against water, salt, and stone chips instead of peeling off in sheets a month later.
If you live where roads get salted, drive gravel, or keep a vehicle for the long haul, undercoating is less about “making it look new” and more about slowing corrosion at seams, welds, and exposed metal. The catch is that a sloppy job can trap moisture or cover active rust, which tends to make the problem worse over time.
This guide walks through product selection, what to clean (and what not to coat), and a practical step-by-step workflow. I’ll also flag common mistakes that waste time and money, plus the moments when a shop really is the smarter move.
Before You Start: Is Undercoating Even the Right Move?
Undercoating is not one product or one approach. Some coatings are thick and rubberized, others stay waxy, and some are oil-based and “creep” into seams. Your climate and your current underbody condition should drive the decision.
- Best fit: newer vehicles, clean underbodies, or light surface rust in salt states.
- Maybe: older vehicles with flaky rust, especially if you’re tempted to “cover it up.” That usually needs rust repair, not just coating.
- Not a magic fix: active rust that’s scaling, soft metal, or holes. Undercoating can hide it, but it won’t stop structural loss.
According to NHTSA, vehicle corrosion can affect safety-critical components (like brake and fuel lines) in some cases, so if you see heavy rust near those systems, it may be worth having a qualified mechanic inspect before you spray anything.
Pick the Right Undercoating Type (Quick Comparison Table)
Most DIY projects fail because the coating choice doesn’t match the situation. Use this as a reality check before you buy supplies.
| Type | What it’s like | Pros | Cons / Watch-outs | Typical use |
|---|---|---|---|---|
| Rubberized / asphalt-based | Thicker, textured, dries to a firm film | Good chip resistance, easy aerosol application | Can trap moisture if applied over rust or wet surfaces | Clean underbodies, mild climates |
| Wax-based | Waxy film, often semi-transparent | Self-healing, good seam coverage | Needs reapplication, can drip during warm weather | Salt belt, annual maintenance |
| Oil-based “fluid film” style | Oily, stays wet and creeps into seams | Great for existing light rust, strong creep | Messy, attracts dust, needs regular touch-ups | Rust prevention in harsh winters |
| Epoxy/paint + topcoat (more advanced) | Paint system, often with rust converter/primer | Durable if surface prep is excellent | Labor heavy, sensitive to prep and cure windows | Restoration, controlled garage work |
DIY Readiness Checklist: What to Inspect Under the Car
Before you learn how to undercoat a car at home in a “spray and done” mindset, crawl under and decide what you’re actually dealing with. This takes 10 minutes and saves you a weekend of rework.
- Dryness: any damp insulation, wet seams, or mud packed in pockets needs cleaning and drying time.
- Rust stage: light orange surface rust is manageable; thick scale that flakes off is a different project.
- Leaks: oil leaks, gear oil, or power steering fluid will ruin adhesion and keep dissolving some coatings.
- Heat zones: exhaust, catalytic converter, mufflers, and heat shields need clearance.
- Sensitive parts: brakes, rotors, pads, belts, pulleys, rubber bushings, and electrical connectors should not be coated.
If you find brake line corrosion, fuel line corrosion, or rust swelling at mounting points, pause and consider a professional inspection. Spraying over those areas can make future diagnosis harder.
Tools, Materials, and Safety Gear You’ll Actually Use
This job is straightforward but it’s still chemicals overhead, so the gear matters. According to OSHA, proper respiratory protection depends on the product hazards and ventilation, so read the product SDS and don’t assume a dust mask counts as protection.
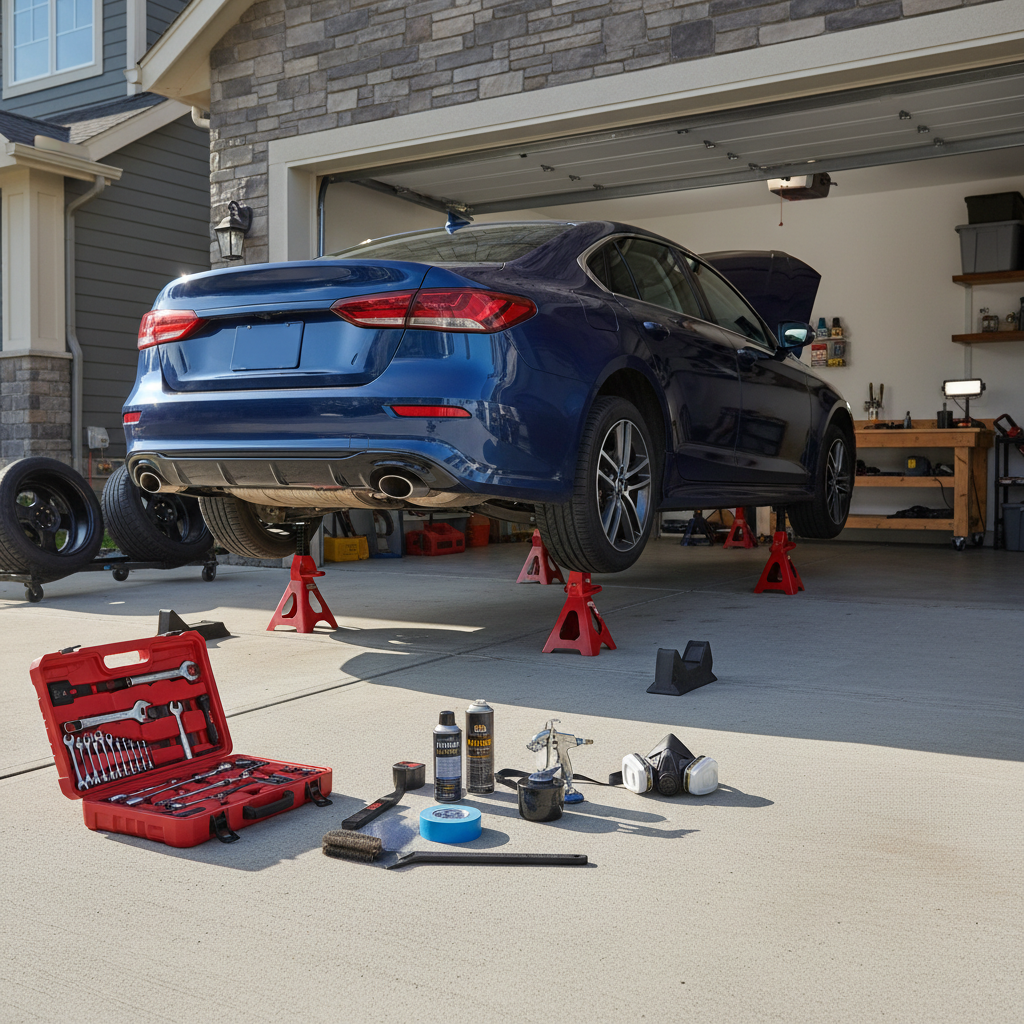
- Lift & safety: floor jack, jack stands rated for your vehicle, wheel chocks, a flat surface.
- Cleaning: degreaser, pressure washer or strong hose nozzle, stiff brushes, rags.
- Rust prep: wire brush, scraper, sandpaper or a drill with wire wheel (optional).
- Masking: painter’s tape, plastic sheeting, cardboard for shields.
- Application: aerosol undercoating cans or a spray gun kit (depends on product).
- PPE: safety glasses, gloves, long sleeves, and a respirator suited to solvents if required by the label.
Key point: If you can’t safely lift and support the vehicle, don’t “make it work.” A shop bay is cheaper than an accident.
Step-by-Step: How to Undercoat a Car at Home (Clean, Prep, Spray)
This is the workflow that tends to produce consistent results. The time is mostly cleaning and drying, not spraying.
1) Wash the underbody like you mean it
Remove salt, mud, and oily grime. Degrease around the engine bay underside, transmission area, and rear differential region if needed. Rinse thoroughly.
- Focus on seams, pinch welds, and behind plastic splash shields if you can safely access them.
- Avoid blasting directly into electrical connectors with high pressure at close range.
2) Let it dry completely
Undercoating over moisture is where many DIY jobs go sideways. Dry time depends on temperature and humidity, and it’s often longer than people expect.
- If possible, leave the car overnight in a garage with airflow.
- Pay attention to boxed sections and pockets where water lingers.
3) Knock down loose rust, don’t chase perfection
If you see surface rust, remove loose scale with a wire brush and wipe dust. For heavier corrosion, a dedicated rust remediation plan may be more appropriate than coating.
- Loose flakes must go, otherwise your undercoat bonds to rust that’s already separating.
- If you use a rust converter/primer, follow its cure window before topcoating.
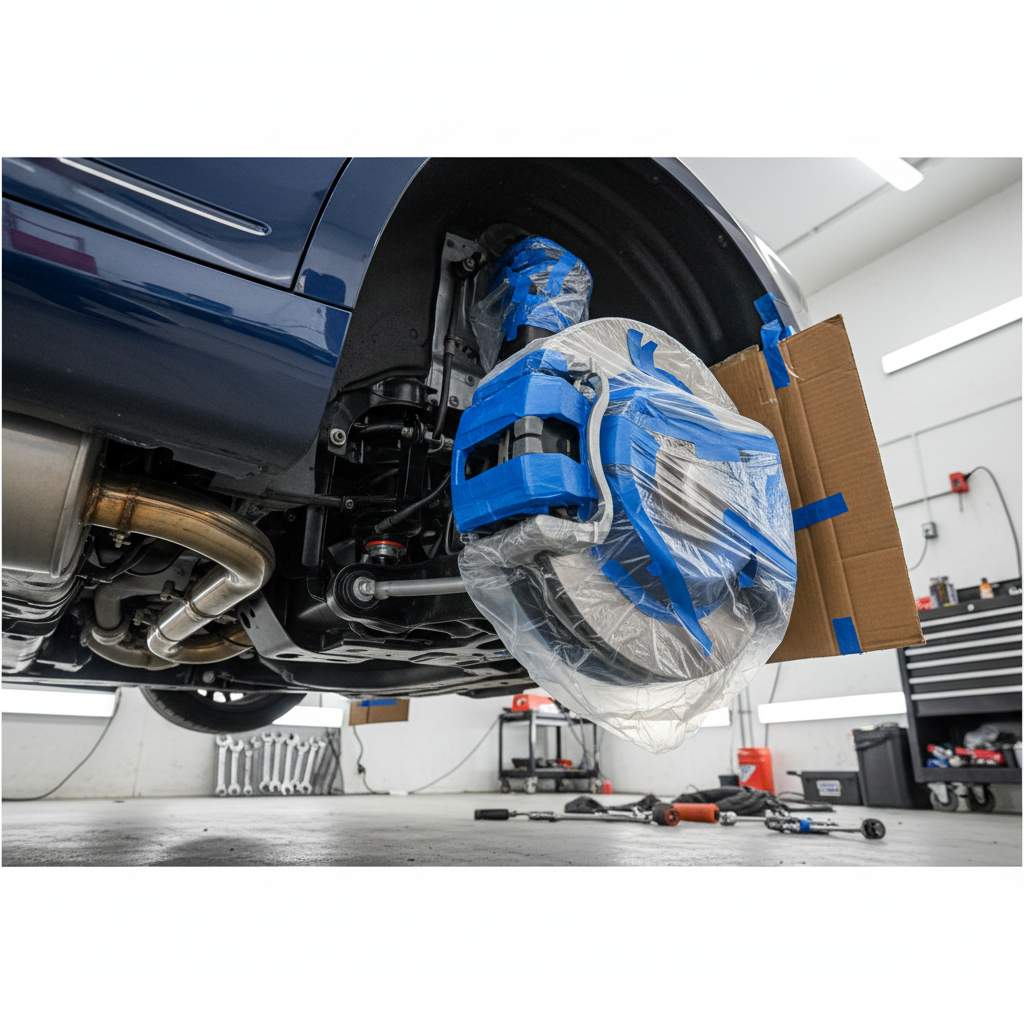
4) Mask what should not be coated
Masking feels fussy, but overspray on brakes or exhaust is a headache.
- Do not coat: rotors, pads, calipers, belts, pulleys, exhaust, O2 sensors, catalytic converter.
- Be cautious: rubber bushings and CV boots, some coatings can swell rubber over time.
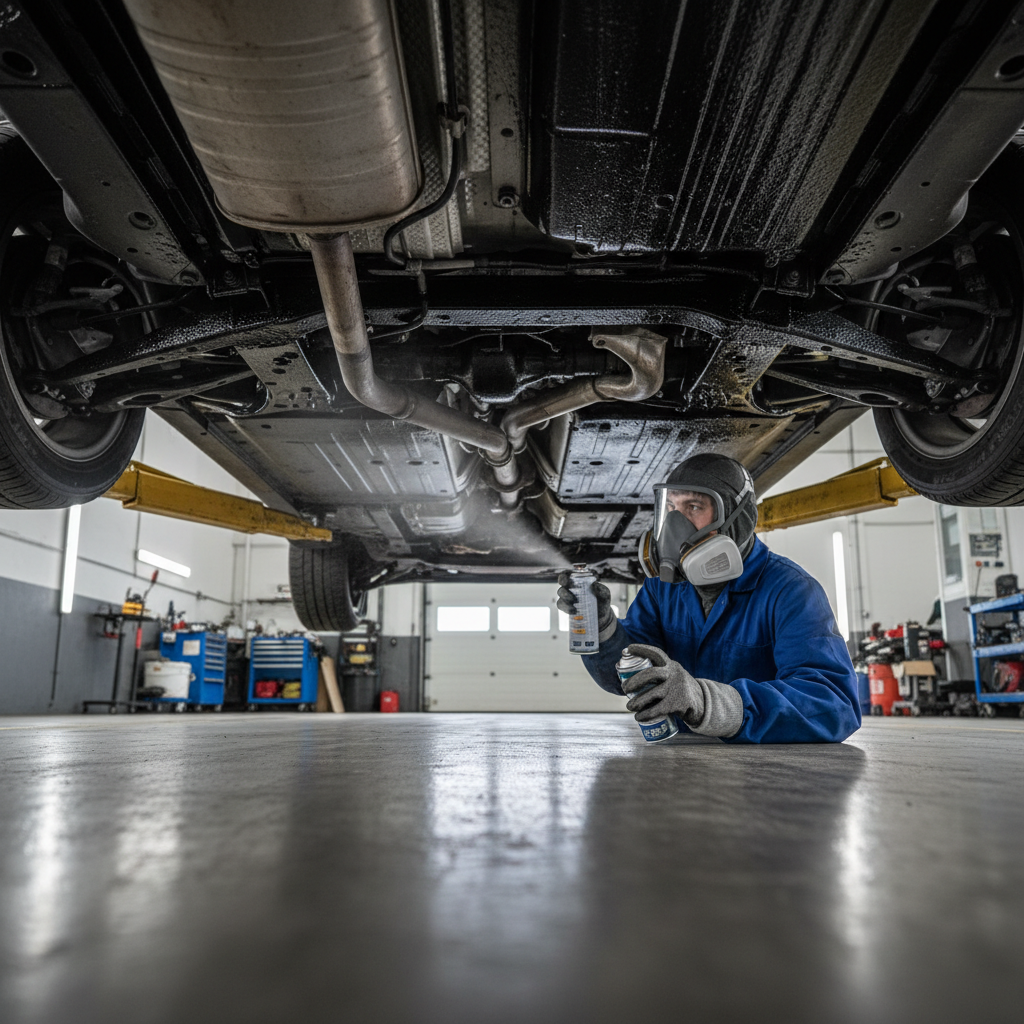
5) Apply in thin, controlled passes
Shake cans well or mix product per directions. Spray light coats and build coverage. Thick wet coats are more likely to run and trap solvents.
- Maintain consistent distance and overlap, like painting.
- Work front-to-back so you don’t crawl through fresh coating.
- Give flash time between coats if the label calls for it.
6) Respect curing and reassembly time
Even if it feels dry, curing can take longer. Avoid driving through rain or slush until the product has had a fair shot to set. If you removed shields, reinstall after coating becomes tack-free unless the manufacturer recommends otherwise.
Practical Tips for Better Coverage (Without Making a Mess)
Once you’ve done one underbody, you realize the hard part is reach and angle, not the spray itself.
- Use light to check shine: missed areas usually look dull or dusty compared to coated sections.
- Cardboard shields help: hold a flat piece behind a bracket or near a line to prevent overspray.
- Don’t ignore wheel wells: they take direct blast from debris and salt.
- Mind drain holes: don’t plug factory drains in doors/rockers if you’re spraying near them.
- Plan for reapplication: wax/oil systems often work best as maintenance, not “one and done.”
Key takeaway: A thinner, more even coat that fully cures usually outperforms a thick coat that skins over and stays soft underneath.
Common Mistakes That Cause Peeling, Odor, or New Rust
A lot of “undercoating failed” stories trace back to a handful of predictable issues.
- Spraying over wet grime: moisture and dirt break adhesion, then rust keeps growing under the film.
- Coating active leaks: oil saturation prevents bonding, and the coating can soften.
- Blocking heat: spraying near exhaust can create smoke, odor, and premature failure.
- Ignoring existing heavy rust: thick scale keeps shedding, so the undercoat falls off with it.
- Skipping maintenance: some products are meant for periodic renewal; treating them as permanent backfires.
When It’s Smarter to Call a Pro (and What to Ask For)
DIY is great when the underbody is mostly sound and you can prep well. A shop is often the better route when corrosion is advanced, access is limited, or you want a controlled spray booth.
- Rust scale near suspension mounts, subframes, or brake/fuel lines.
- You don’t have a safe lift plan or you’re working on uneven ground.
- You need internal cavity treatment for rockers/doors and don’t have the wands.
Ask a shop what product system they use, whether they clean first, and if they offer annual touch-ups. If they won’t discuss prep, that’s usually a signal.
Conclusion: A Simple Plan That Actually Works
How to undercoat a car at home is less about finding a “perfect” coating and more about controlling the basics: clean metal, dry surfaces, careful masking, and patient curing. If you do that, even a modest DIY setup can deliver real protection in salt and gravel conditions.
If you want a practical next step, pick your product type based on climate, set aside enough time for washing and drying, then do a small test area before committing to the full underside. That one test patch tells you a lot about adhesion and spray pattern.
FAQ
How often should I reapply undercoating at home?
It depends on product type and driving conditions. Oil and wax films often need yearly refreshes in harsh winter states, while some rubberized coatings can last longer if prep was clean and the underbody stays mostly dry.
Can I undercoat over rust?
Light surface rust is sometimes acceptable if you remove loose material and use a compatible rust treatment when recommended. Thick flaky rust is risky to cover because the coating may bond to rust scale that keeps separating.
Is rubberized undercoating bad in the salt belt?
Not automatically, but it’s unforgiving about prep. If applied over moisture or hidden rust, it can seal in the problem. In heavy salt areas, many people prefer wax or oil-based products that creep and are easier to renew.
Do I need to remove the wheels to undercoat a car?
You can do a basic job with wheels on, but removing them improves access to wheel wells and suspension arms. If you’re short on time, prioritize wheel wells and exposed seams since they see the most abuse.
What temperature is best for undercoating application?
Follow the label, but most products apply and cure more predictably in mild temperatures with low humidity. Cold weather can slow curing and make thicker coatings spray poorly.
How do I avoid getting undercoating on brakes?
Mask rotors and calipers, and use cardboard shields when spraying near lines and brackets. If overspray happens, don’t drive until you clean affected brake surfaces with an appropriate brake cleaner.
Will undercoating void my warranty?
Warranty situations vary. If you’re concerned, check your warranty terms and ask the manufacturer or dealer what they consider acceptable. Keeping receipts and product info can help if questions come up later.
If you’re trying to protect a daily driver through winter but don’t want to guess on product compatibility, prep steps, or masking targets, a simple checklist and a small-surface test plan usually makes the whole DIY job feel a lot more controlled.